

Hello? Is there anybody out there? Just click if you can read me…
It has been awhile since I’ve been here. The other day when I opened the door up to this place and flicked on the cyber lights everything still looked to be in order other than the fact there was a layer of dust on everything. I fired up the virtual air compressor and blew everything off, changed the oil and filter in the hard drive, topped up the argon tanks, cranked up the heat, and went heavy on the speeds and feed to get the work grunting. After taking inventory it looks as though nothing much has changed. I guess that’s the beauty of garage life…it goes back to the beginning of time.
For those of you who are regular followers of the blog you may have noticed the postings were lacking for the past 6 months. Truth is I got busy and something had to give. The majority of the past 10 months were spent completing a major basement development. It was not what I consider to be blog material. I was still doing smaller garage projects during that time but I only had so much time to dedicate to things. The blog was not one of those things.
I receive many comments from readers. Some of you were kind enough to express some concern as to what happened to the regular postings. There are many others who are usually in need of help or request services from me. I apologize for my lack of response over this past while to all of you. I needed to make sure I was looking after things at home first and that was all I had time for. Today, though, I am feeling like my old self and ready to get back at things.
As usual there are lots of things going on in gordsgarge these days. It’ll take some time, and some blog entries, to bring you all up to speed. The main project, which many have been asking about, involves the CNC plasma table build. I am thrilled to say that after the basement work was complete I jumped back in, with both feet, to the plasma table build. Ongoing progress will not make its way onto the blog. I was building from the top of my head, it got complicated, I didn’t take pictures, it was very time consuming, and many hours were spent just performing repetitive machining sequences. I am happy to say that I have been able to make my first test cuts this past week and everything appears to be coming together. I will, at some point, feature the finished project on the blog.
This brings me to today’s blog posting. I’m starting of slow just to get things rolling. I did a project for a friend of mine that involved a custom shifter knob, which he designed, for his 911 Porsche. He wanted something unique yet vintage looking for his 1973 SC. He had taken apart an old R12 air conditioning compressor from a different 911 and salvaged the pistons out of it. They are a perfect size to build a shift knob from.
Instead of just plunking a piston down on top of the shift rod he figured a nice wood accent would lend itself well to a retro look. After we tossed some ideas around he/we settled on the following. I think it all worked out to his liking and should he wish to covert back to stock I didn’t modify anything on the vehicle side that would prevent him from doing so. Like the good ole days I’ll let the pictures do the talking.

This is my friend Jon’s Moss Green Metallic 1981 911 SC ROW/German spec’d Porsche that is getting the shift knob retrofit.
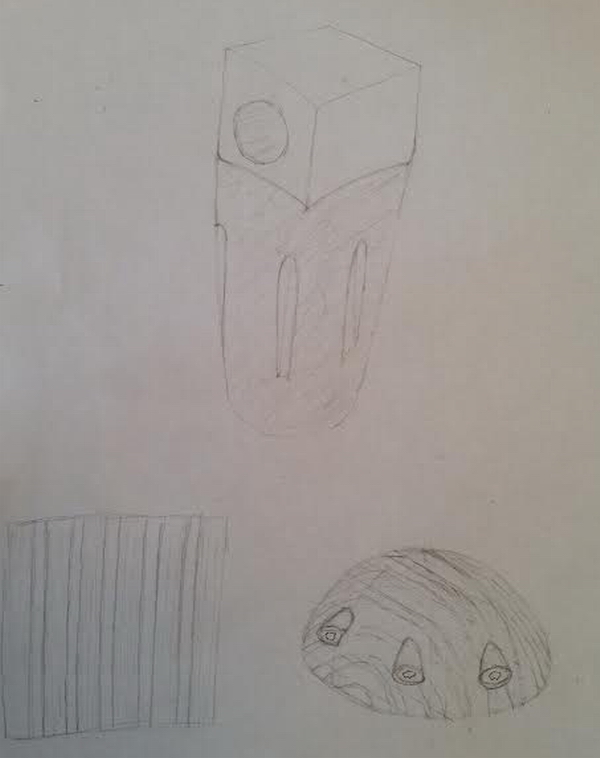
This is the Mad (Manual-aided design) that my friend provided to me as the official concept design and blueprint. He can draw better than I can.
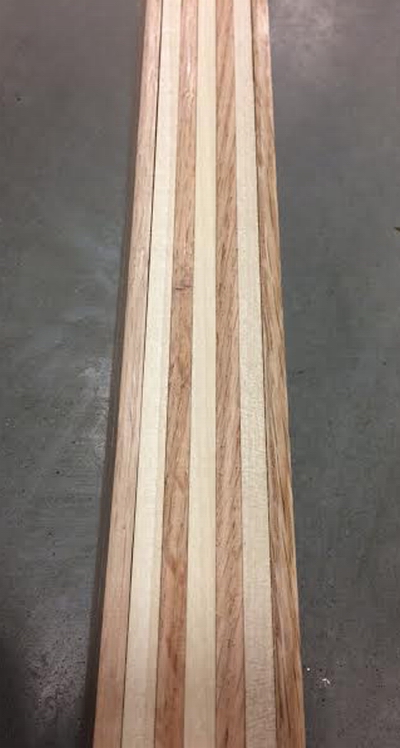
We played with different woods, and wood patterns, every time one of us was out at a store that carried project wood. This is 1/4″ maple and oak stacked as a sample.
The wood, and pattern, that was settled upon was 1/8″ birch plywood sandwiched with 1/4″ solid oak.
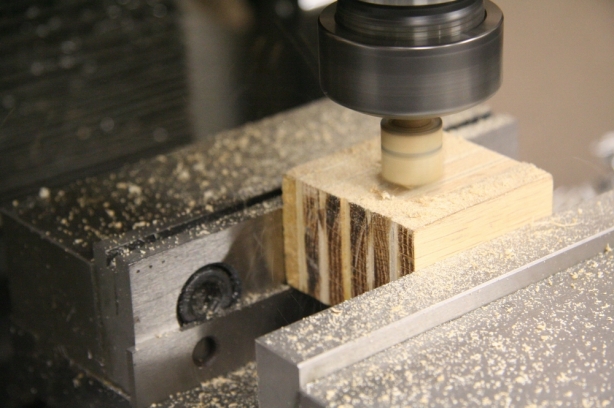
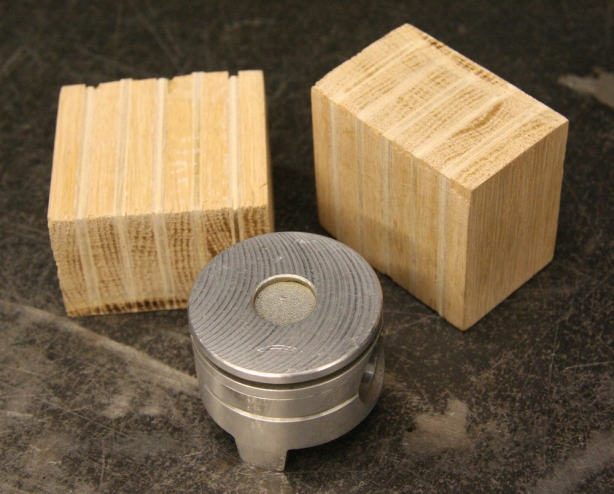
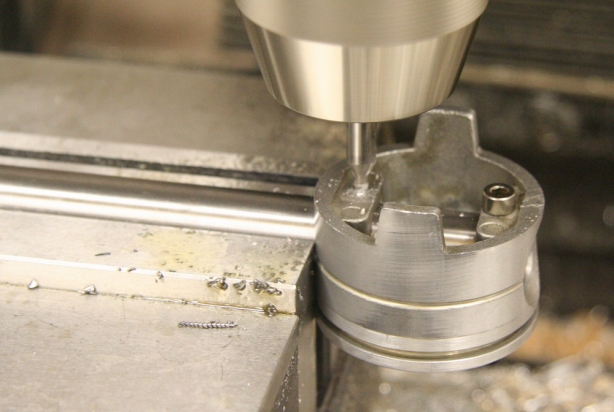
My friend supplied me the wood already glued and in blocks (yes plural, always have a back up plan). First order of business is to mill a flat surface to work from using a router bit chucked up in the mill.
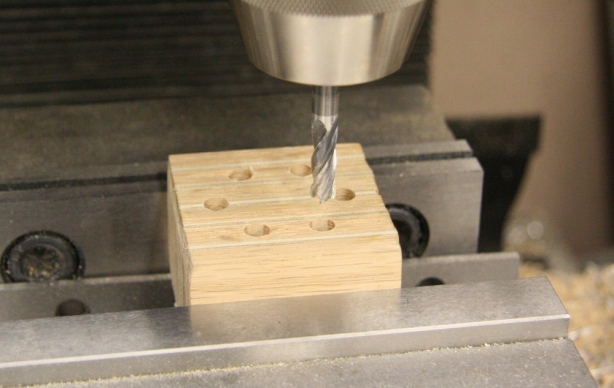
The wood was then drilled out in order to accept 4mm socket head stainless steel bolts. I use an end mill in order to counter sink the socket heads.
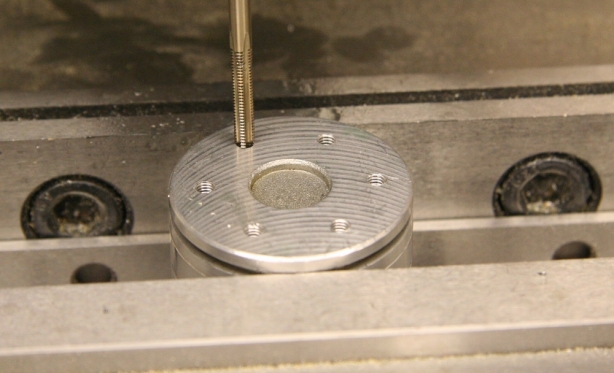
Next the piston was drilled and 4mm tapped in the same pattern.
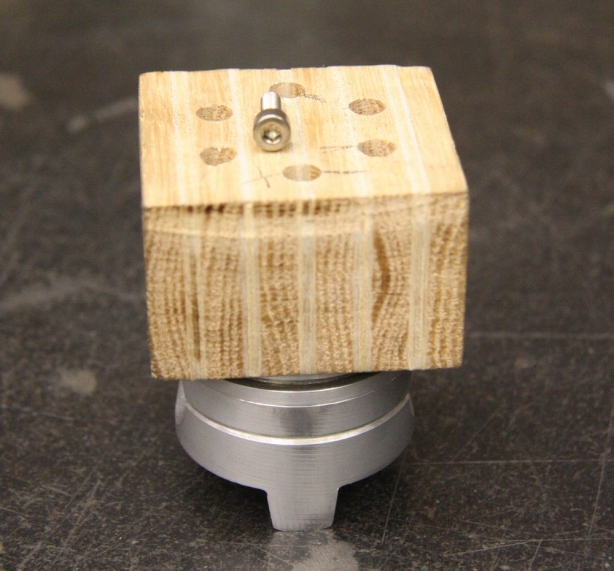
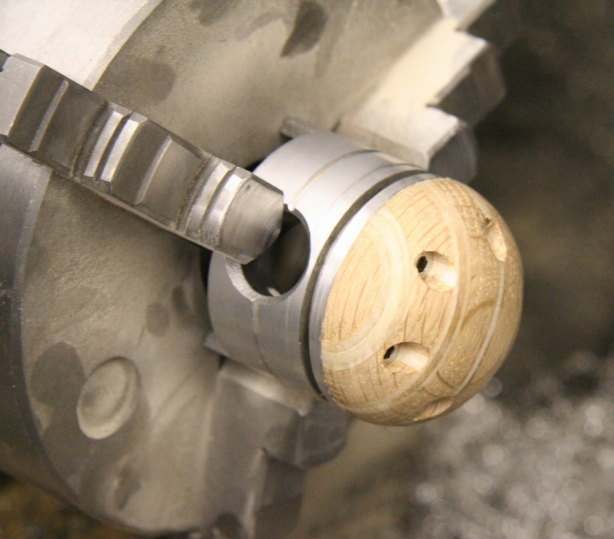
The prepped blank and piston get hitched and are ready to go for a spin.
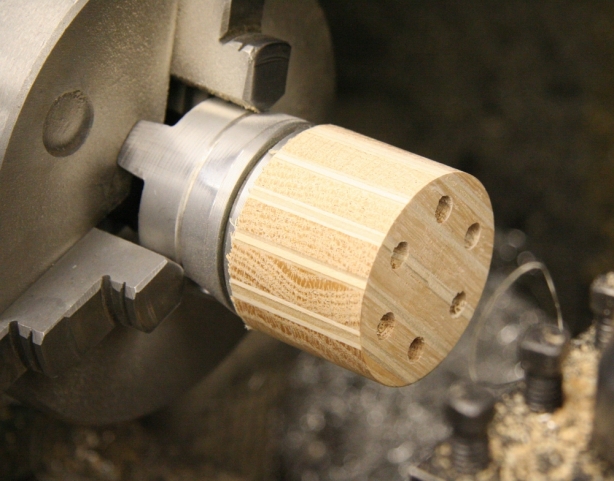
The diameter was roughed down to size using a carbide cutter on the lathe.
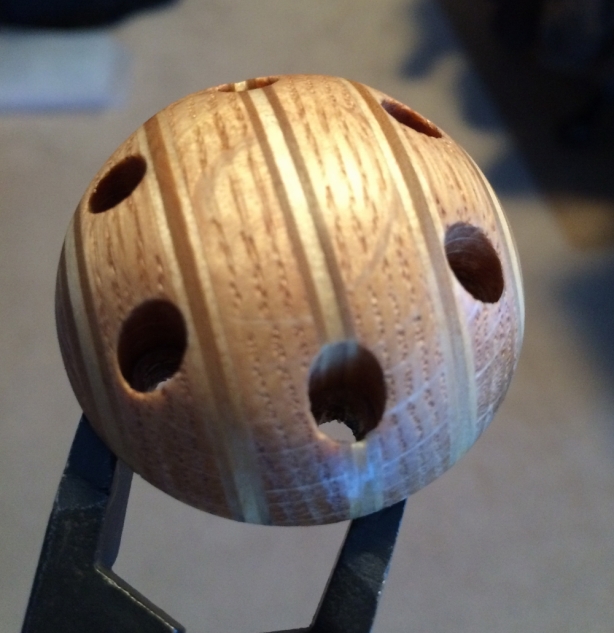
The profile was also roughed out using a carbide tip to where the shape was close. The fine dimensions where then cleaned up using sandpaper.
With the top rough fabricated it was time to direct the attention to the base. The piston required some kind of mounting to the shifter rod. The understand of the piston was drilled on the pin bosses.

Using some 6061 aluminum stock the end was faced and drilled to the same dimensions as the underside of the piston. The radius side was then drilled and tapped in order to accept a set screw which will secure the sleeve to the factory shift rod.
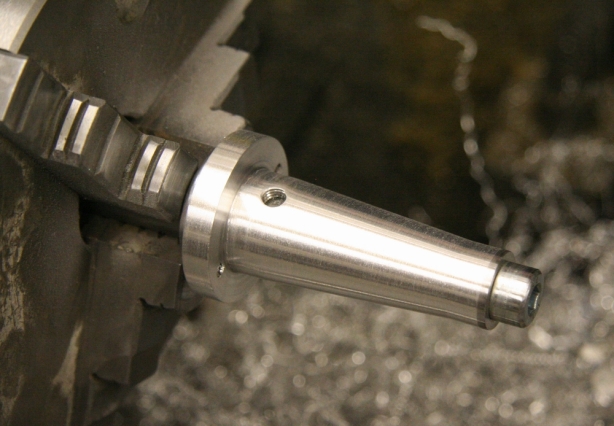
Moved onto the lathe to start shaving material off and bring the profile to a clean, light, shape.
Onto the finishing stage. The piston top received a couple of coats of a polyurethane clear coat to aid in protection, It will hopefully help add some “character” wear as the piston gets some use.
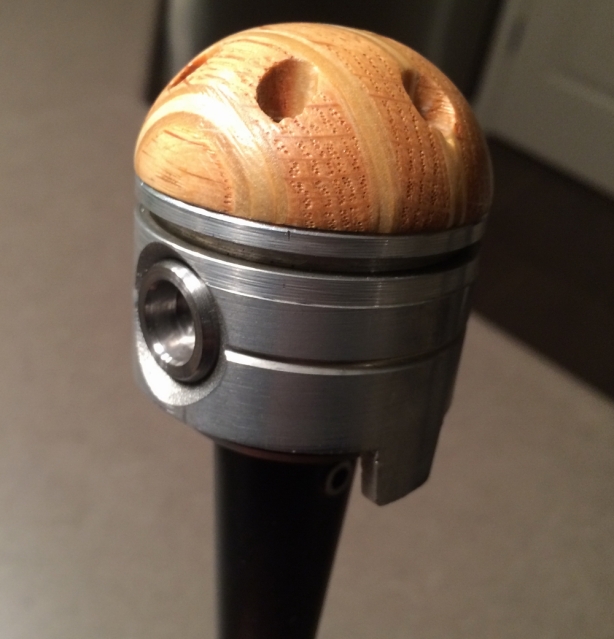
This is the assembled piston. This photo shows some details that I didn’t cover in the previous build pictures. Mainly the fake wrist pins. The one pin you can see is actually a “nut” that allows the fabbed sleeve to bolt to the piston. The sleeve, which is blurred out, received a shot of primer and the was airbrushed black.
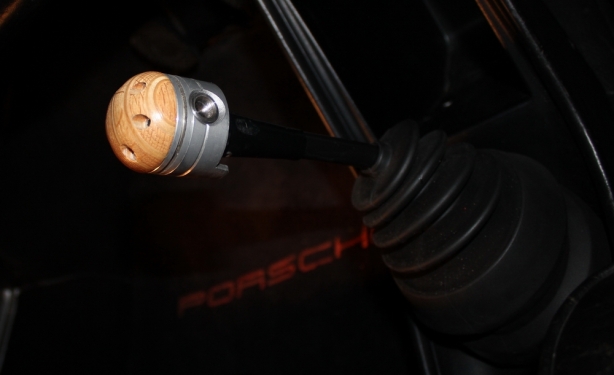
Installed and ready to synchronize some constant mesh


Amazing!
Thanks Dio, it wasn’t a huge time commitment project but the proper planning made it come together.
Thanks!
Gord
As always, awesome work.
Doug! Thanks for chiming in. Next time I’ll have to ditch the lathe and carve one; expect a phone call.
Thanks!
Gord
Gord, how exciting to see a new post from you. You won’t believe this, but just yesterday I wondered what happened. I couldn’t remember when the last time I had seen a post. I have always enjoyed your creativity, attention to detail, and ability to share it with pictures. Nicely done shift knob. All the best to you. Joel…..
Thank you for the comments Joel. It had been awhile since I visited this place but it’s nice to be back. I’m excited to start tackling lots of ideas.
Thanks!
Gord
Nice work!
Thanks for stopping in and taking a look Albert.
Thanks!
Gord
Greetings from Henderson, NV
Henderson ,NV? I miss NV, I used to spend a couple weeks a year in Reno for business. It gave me opportunity to explore Lake Tahoe over a weekend once. Loved it!
Thanks!
Gord
Nice to see another entry in your blog.
On Sun, Dec 11, 2016 at 11:35 AM, GordsGarage Blog wrote:
> gordsgarage posted: ” Hello? Is there anybody out there? Just click if you > can read me… It has been awhile since I’ve been here. The other day when I > opened the door up to this place and flicked on the cyber lights everything > still looked to be in order other than the fact ” >
Thanks! It’s nice to be missed.
Gord
Welcome back! I missed looking at your art. Thank you for sharing.
Nice detail on this new project.
Thanks Luis, funny how I never think of my stuff as art. I always think you need a degree to have your stuff classified like that. I’m glad you think it is.
Thanks!
Gord
Welcome back Gord. Nice build as always.
Thanks Chris, it was worth doing a blog entry just to hear from you.
Thanks!
Gord
now this is the Gordon we know! Bloody nice shifter knob!
Thanks George, not only does the shifter knob look good it apparently has good weight balance to it. Thanks for stopping in to look around.
Thanks!
Gord
Glad you’re back and hadn’t lost your touch, finger, hand, eye………………………
Out of those options this is the order I would choose to loose things in. 1. Finger 2. Eye 3. Hand 4. Touch
Thanks Rick!
Gord
yep still here reading
Still reading? I thought people only came for the pictures!
Thanks!
Gord
Wahoo! You’re back!
Here’s Johnny! Thanks for stopping in.
Thanks!
Gord
sure have missed seeing your projects. another great build.
Hold onto you seat, I’ve got another one coming up any day now.
Thanks!
Gord
Well all of your skill has been costing me a ton! last year after seeing your “clean your shoes” sign for the school I wound up with a $2000 24′ Vinyl cutter, and for the last 6 months I’ve been building a CNC Plasma table that I just got running about 2 weeks ago! You would be in danger if my wife knew that you were my inspiration for all this building up tooling. hahaha. I look forward to the next one!
I love it! Don’t stop. You seem to be on roll. The vinyl plotter gets a fair amount of use, not just for my stuff but for school projects and other things. The CNC plasma is just pure fun. Have any pics posted anywhere?
Thanks!
Gord
the Vinyl is starting to get popular with the firemen at work. They all seem to have their own little niche items they build and are starting to see the vinyl can speed those projects up tremendously. As far as posting pictures of the build, I took pictures along the way but haven’t found the time to post them up anywhere. Just got to the point of cleaning up material storage and making a little room to move around the plasma table. It is an incredibly useful piece of equipment. Still learning Inkscape, Sheet Cam, and Mach 3 but it’s getting better with each project.
The vinyl plotter has many uses. I initially bought mine to create sandblasting stencils however, as it turns out, that is what the plotter gets the least use for. I too had to learn Inkscape, Sheet Cam, and Mach 3 but I am certainly getting more proficient with it the more I use them. Stick with it.
Thanks!
Gord
I’m glad my inquiry sparked that motivation to write up a new post… Glad to hear your doing good and that projects are moving forward whether we see them or not …. and as always another awesome build my friend!
Thanks Alfonso, the consistent following of the blog by you is appreciated.
Thanks!
Gord
Love your posts! I check your site often to see what you are “up” to. Thanks for sharing
Thanks for taking the time to comment Cary, visitors always welcome.
Thanks!
Gord